Achieving accuracy in metal roofing cuts begins with the right tools. Ensure correct measurements, prioritize safety, and cut with precision. Dive into our comprehensive guide for detailed insights.
Table of contents
Choosing the Right Tool
In the realm of metal roofing, the tool often dictates the quality of the outcome. Like a master chef selecting the perfect knife for a specific cut of meat, selecting the right tool for your metal type ensures precision, efficiency, and safety. Let's delve into the tools best suited for different metal roofing materials.
Tin Snips
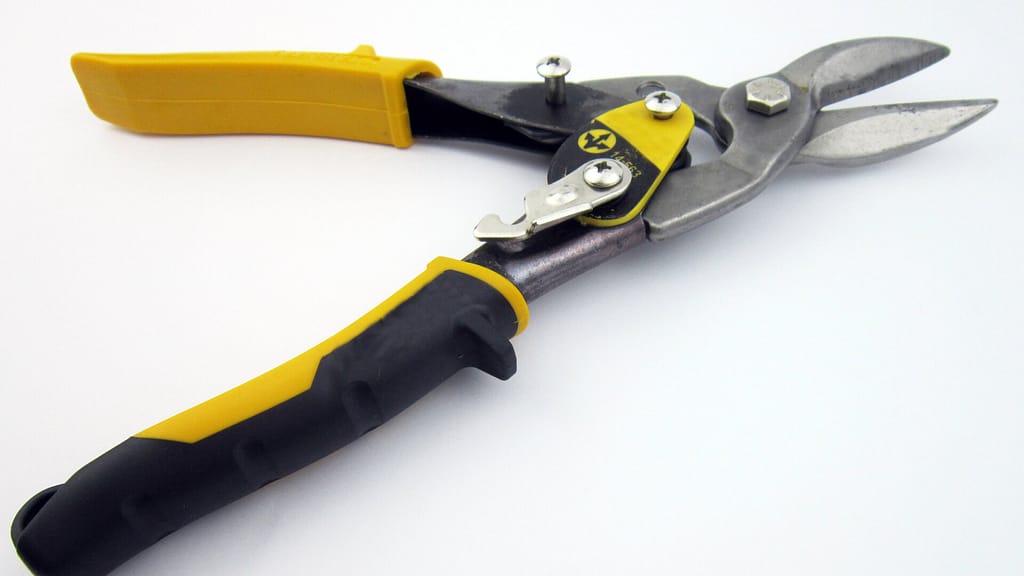
Tin snips are the metal world's equivalent to scissors, specially crafted for slicing through thin metal sheets.
Have you ever spotted the color-coded handles on tin snips? They serve a purpose. Red-handled snips cater to straight and left cuts, making them popular with right-handed individuals. On the other hand, green-handled snips specialize in straight and right cuts, perfect for left-handed users. If you're exclusively looking to make straight cuts, then yellow snips will do the trick.
Your choice of blade hardness depends on the metal's thickness and toughness. Using the Rockwell HRC scale, snip hardness varies from HRC 56 to 65. For example, when working with thicker steel, you'd lean towards snips on the higher end of this range.
The metal's nature also guides your blade choice. Smooth blades are perfect for soft metals like zinc or aluminum, ensuring a smooth finish. Meanwhile, harder metals, especially the thicker ones like stainless steel, require serrated blades for a superior grip and effortless cutting.
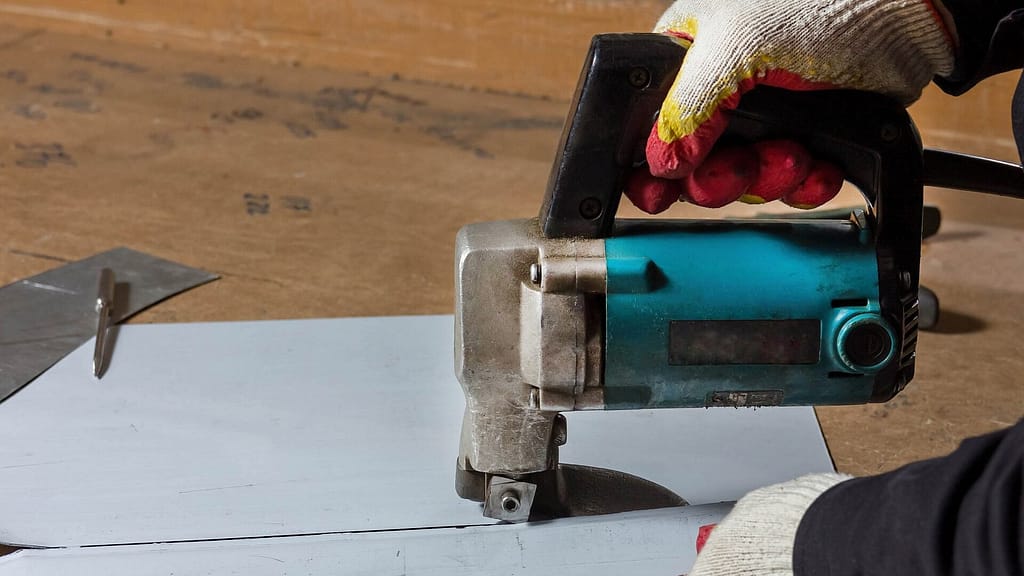
Power Shears
Often described as a supercharged version of tin snips, power shears can quickly slice through metals, offering both single and double cutting variants. While the single-cutting option excels in making waste-free, clean cuts, the double-cutting design, with its dual blades, creates a broader kerf, resulting in more cutting waste.
One significant advantage of power shears is their capability to handle heavy-duty tasks, particularly the single-cutting models. They can manage metal materials with a thickness up to 10 SWG (3.2mm), depending on the specific model.
Their design ensures user-friendliness and, with practice, they're relatively easy to master. Another highlight is their swift operation, devoid of sparks, especially with the waste-free single-cutting version.
However, every tool has its limitations. Power shears face challenges with intricate curves, sometimes producing jagged or sharp remnants. There's also the potential issue of material distortion, especially with single-cutting shears, which might warp or bend the metal.
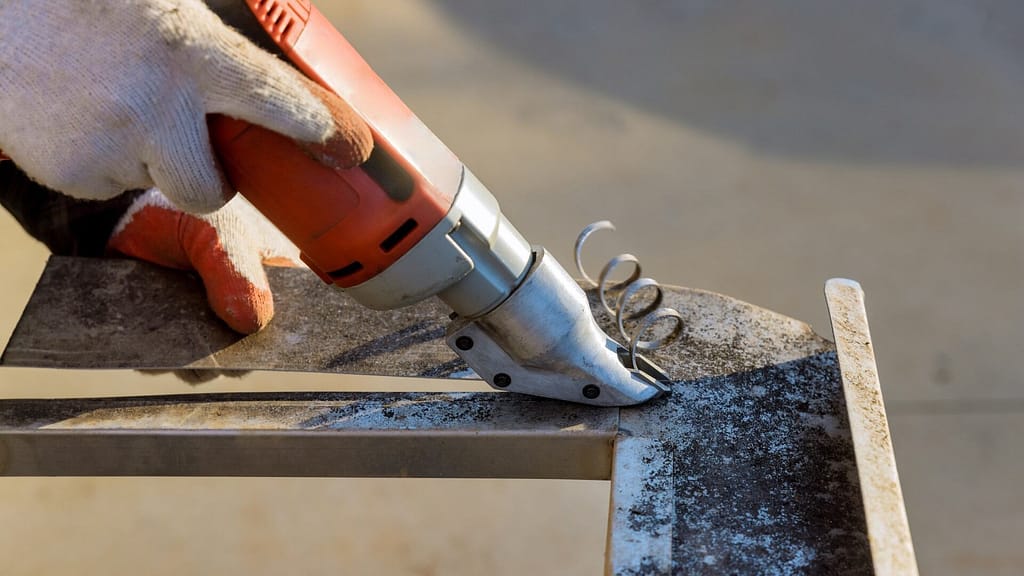
Nibbler
Unlike other tools, they operate by 'nibbling' away at the metal, much like a rodent chewing through material. This method involves a 'punch & die' assembly that gradually destroys the material it's guided through, releasing small, semi-circular chips in the process.
One of the key considerations when purchasing a nibbler is its capacity, which indicates the maximum thickness it can handle. This typically ranges from 8 to 10 gauges.
Moreover, the strokes per minute a nibbler can produce vary with the material. Thicker materials like steel require fewer strokes, while thinner gauges demand higher strokes for a seamless finish.
While there are several types of nibblers, such as punch and die nibblers, nibble shears, and pneumatic nibblers, each serves a distinct purpose and offers varying advantages. For instance, punch and die nibblers operate beneath the metal sheet, progressively cutting as pressure is applied from above.
In contrast, nibble shears are perpendicular to the metal sheet during cutting, providing an intuitive and distinct approach. Pneumatic nibblers, the most expensive of the trio, rely on air pressure to punch holes in metal sheets.
Circular Saw
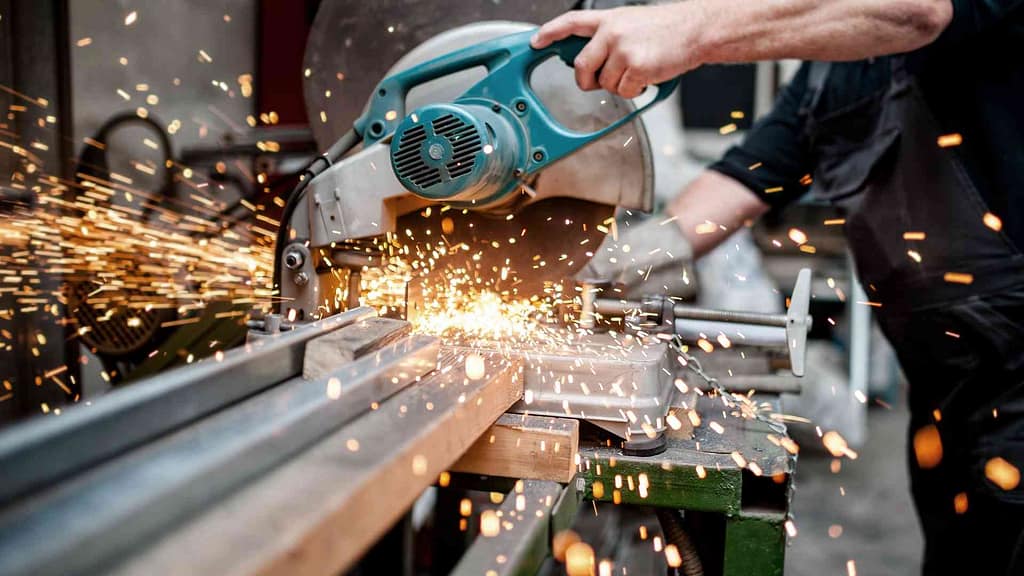
We couldn't find a great picture of a circular hand-held saw cutting metal. So we're showing you something similar. A miter saw. But you get the idea.
Circular saw blades stand out for their versatility. These blades, with their varied sizes and types, surpass traditional tools like snips in speed and accuracy. Whether you're aiming for long, straight cuts or intricate curves, these blades can handle the task adeptly.
However, every tool comes with its quirks. Circular saw blades can be noisy and, at times, produce sparks. Hence, ensuring safety by using the right protective gear is paramount.
When selecting the perfect blade for your circular saw, consider its material composition. Blades forged from materials like carbide or those tipped with diamond are not only efficient in slicing through metal but also offer enhanced durability. Moreover, the tooth count on a blade can impact its performance; a higher number of teeth often results in smoother cuts, while fewer teeth facilitate faster cutting. Typically, for many metal tasks, blades boasting 40 to 80 teeth strike the right balance.
It's also essential to match the blade to the type of metal in use. Non-ferrous metals, such as brass and aluminum, pair best with carbide-tipped abrasive cutoff wheels. Interestingly, these carbide-tipped blades can outlast standard steel blades by up to ten times, offering both efficiency and longevity.
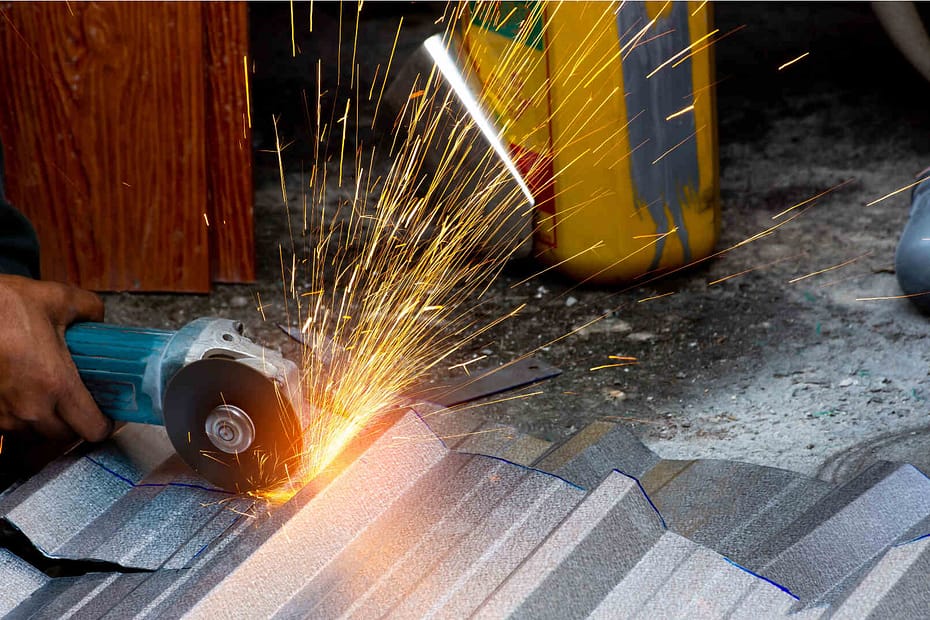
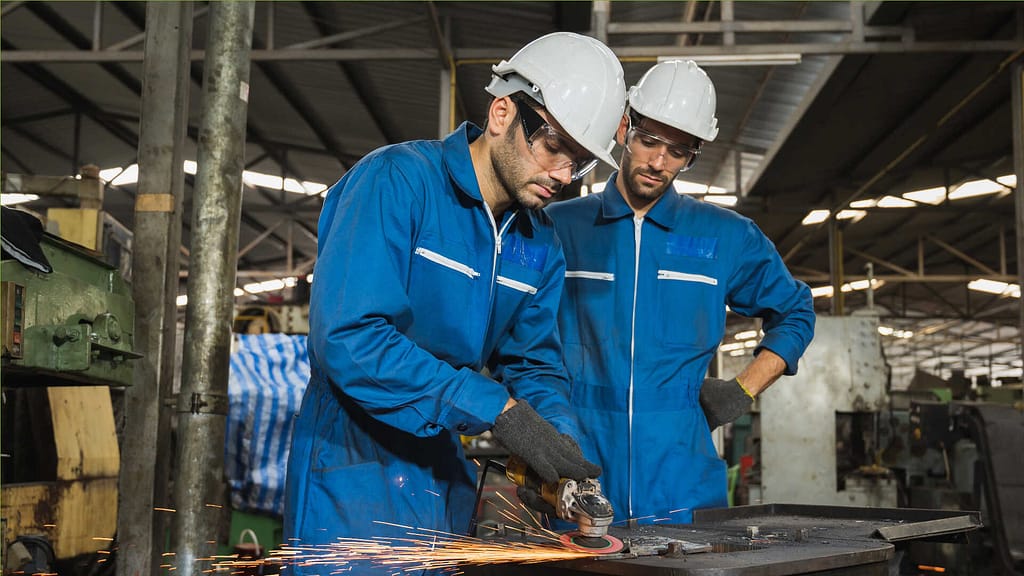
Angle Grinder

Angle grinders, versatile as they are, have evolved from the early bulky cast iron models to today's more lightweight versions. Modern grinders, with their varied sizes and functions, allow users to cut through thick metal panels with ease, eliminating the need for extra hands, as was the case with traditional metal shears.
While using these grinders, it's essential to elevate the section you're working on, ensuring the tool doesn't strike any surfaces underneath, which could lead to rapid disc wear.
Your roofing task dictates the kind of grinder you should opt for. If the job demands durability and longevity from your tool, look for grinders with housing resistant to dust and moisture. Lighter models are preferable for extended use, and safety features like protective covers that direct debris away from the user are a must. Some models even come equipped with a dust extraction system, ensuring a clean workspace.
While they provide ample maneuverability, especially in tight spaces, they may lack the precision of tools like the circular saw for long, straight cuts. For lengthy, straight cuts, a circular saw is advisable, but for shorter, specific tasks, an angle grinder could be the tool of choice.
How I've Cutting Metal Roofing Before

With its promise of durability, aesthetic charm, and eco-efficiency, metal roofing is an excellent choice for modern homes. However, its success lies in accurate installation which starts with meticulous cutting. Here’s a general approach to ensure you get it right from the start. Warning: This is a dangerous task. We recommend consulting with a professional before cutting any metal. Do at your own risk.
1. Safety Equipment
Before beginning any project. Review all safety warning cards included with your equipment. Also keep in mind the following:
Wearable Safety:
- Safety Glasses: Essential to protect your eyes from flying metal fragments, sparks, and debris.
- Face Shield: Provides additional protection for your entire face. Some grinders might throw larger particles, and a face shield can help guard against these.
- Hearing Protection: Grinders and circular saws can be loud, especially when cutting metal. Over-the-ear earmuffs or earplugs can help protect your hearing.
- Gloves: Heavy-duty work gloves can protect your hands from sparks, hot metal, and accidental contact with the blade. However, ensure they fit well and do not hang loose to avoid getting them caught in the machine.
- Dust Mask or Respirator: Cutting metal can produce fine metal dust which you shouldn't inhale. Depending on the type of metal and coatings on it (like paint or galvanized coatings), toxic fumes can also be released. A respirator might be necessary for prolonged work or in less ventilated areas.
- Safety Shoes: Steel-toed shoes can protect your feet from falling metal pieces.
- Long Sleeved Clothing: Protects your arms from sparks and hot debris. Ensure that the clothing is snug-fitting and doesn't have hanging parts that could get caught in the tool.
Additional Safety:
- Fire Extinguisher: Sparks from cutting metal can potentially start fires, especially in areas with flammable materials. Have a fire extinguisher handy, preferably a dry powder or CO2 extinguisher suitable for metal fires.
- Clamps or Vices: Ensure that the metal piece you're working on is securely clamped or held in a vice. This not only ensures the safety of the operator but also ensures a cleaner cut.
- Safety Guards: Ensure that the safety guards on your tools are in good condition and correctly positioned.
- Safe Working Area: Ensure that your working area is well-lit, free of unnecessary clutter, and has adequate ventilation if working indoors. Inform those nearby of your work to keep them at a safe distance.
- Safety Training: If you're unfamiliar with the tools, it would be beneficial to have some training or guidance from an experienced person. They can guide you on the correct techniques and safety precautions specific to the tool you're using.
- First Aid Kit: Always good to have on hand in case of minor injuries.
We do not recommend cutting any metal without proper training, safety equipment, and experience.
2. Measure and Calculate the Panels Needed
Before initiating any cuts, ascertain the total number of panels necessary to cover the entire roof. This involves measuring the roof's area and then dividing it by the size of a single roofing sheet. This gives you the total number of sheets required. For homeowners in Massachusetts, you can take advantage of our specially designed roof calculator tailored for your state.
3. Prepare the Metal Sheets for Cutting
Position the sheets on a stable, flat surface such as a worktable or sawhorses to prevent any movement while cutting. For ridge-based panels, placing the flatter underside up will enhance the visibility of markings and optimize the cutting process.
4. Mark the Cutting Areas
Use a tape measure to identify and mark areas that need cutting. To circumvent errors, recheck the measurements and then mark the areas using a permanent marker. For added precision, a combination square (a ruler with a straight edge) can be invaluable. Remember, even a small variation can lead to gaps, resulting in potential leaks. Another tip is using a chalk line reel to mark your cutting lines.
5. Secure the Sheets in Place
To ensure the sheets remain immobile during the cutting process, employ adjustable clamps or place weights on the edges. This part is crucial to a straight cut and to your safety. Any movement in the sheet will result in potential injury, death, or a terrible cut.
6. Use the Correct Cutting Tools
| Tool | Best For |
| Tin Snips | Thinner metal sheets, detailed trimming, and small-scale projects. |
| Power Shears | Thicker metal sheets or large-scale cutting tasks where manual snips would be time-consuming. |
| Nibblers | Intricate patterns, detailed shapes, and tight curves. |
| Circular Saws | Long, straight cuts across large sheets of metal. |
| Angle Grinders | Making rough cuts quickly, usually during the initial stages of a project. |
Always opt for the right tools when trimming the metal sheets. Improper tools can not only compromise safety but can also cause irreversible damage. Familiarize yourself with each tool's usage and ensure precision when cutting along the marked lines.
Special Steps for Notches and Trims:
a. Notch Cutting
For areas around chimneys or sidewalls that require notches, start by marking them. Initially, make cuts across the panel using a profile nibbler. It doesn’t just cut the metal but punches it, making it suitable for cutting over ribs. For straight cuts on flat panel areas, double cut shears are perfect. They cut fast, straight, and leave a polished edge.
b. Trim Ends
For roofing trims, tabs at each end should be cut and bent to seal gaps. Use snips to make one-inch cuts at each bend, then fold the tabs using a hand seamer.
6. Installation
Once all pieces are precisely cut, they're ready for installation.
Best Practices for Metal Panel Cuts
It's imperative to cut metal panels at ground level rather than on the roof or over other panels. The reason? Cutting metal generates fine steel debris known as swarf. When this swarf descends onto a roof, it can cause permanent stains.
In cases where large amounts of swarf accumulate in a single area, it can lead to the rusting of the metal roof panel, resulting in long-term issues. Therefore, it's preferable to cut panels where the swarf can be collected and disposed of effectively.
Cutting in the Field
Should you need to make field cuts, ensure the metal panels are cut using tools that prevent edge rusting, like nibblers, snips, or shears. Avoid using saws, abrasive blades, or torches, as they can produce uneven or coarse edges, stripped of their coating or finish, leading to rust and corrosion.
It's also worth noting that abrasive blades, like those on a skill saw, can propel large amounts of swarf into the air. When this hot swarf lands on panels, it can become embedded in the panel coating, instigating rust in the affected areas.
Safety Precautions
Metal roofing, while durable and efficient, requires utmost care during cutting and installation. Accidents can occur without proper safety protocols. Here's a detailed section about the safety precautions you need to keep in mind:
Prioritize Wearing Protective Equipment
Always wear appropriate gear. Hard hats prevent injuries from falling debris, while safety goggles and face masks protect against dust and metal particles. Due to the loud nature of metal cutting, earplugs or earmuffs are essential. Long-sleeved attire, puncture-resistant gloves, and sturdy footwear shield the body from potential injuries.
Address Airborne and Direct Contact Risks
Metalwork, especially processes like grinding, releases particles that, if inhaled, can lead to health complications. Prolonged exposure can adversely affect the lungs, skin, and mucous membranes. To combat this, it's advised to use respiratory masks tailored to specific needs. Some masks filter out solid debris, while others are designed to neutralize harmful chemical vapors.
Ensure Compliance with Local Regulations
Before embarking on any roofing project, it's vital to familiarize yourself with local building codes and regulations. In many jurisdictions like Florida, it's a requirement to obtain necessary permits before initiating roofing work. These permits ensure that your project adheres to safety standards, zoning laws, and other local guidelines.
Acquiring a permit not only keeps you on the right side of the law but also ensures the work done on your property is safe and up to code. Skipping this step can lead to potential legal complications, fines, or even the need to undo the work later. It's advisable to consult with local authorities or a building inspector to understand what's required for your specific project and location.
Conclusion
Cutting metal roofing with precision and safety is a blend of skill, knowledge, and the right tools. The process is more than just making incisions; it's about understanding the material, knowing which tool to pick for a particular task, and adhering to safety precautions to ensure a successful installation.
Different tools have their unique strengths and weaknesses, and your choice should align with the specific demands of your roofing project. With proper measurement, accurate cuts, and strict adherence to safety guidelines, your metal roofing will not only look professionally done but will also last for years, protecting your home from the elements and enhancing its aesthetic appeal.
Fact Checked by Joseph Castro - 8/21/23