To install a roof vent, start by picking the ideal spot, marking it, making a cutout, placing the vent, securing it, applying sealant, reviewing everything, and cleaning. Proper steps ensure safety and avoid installation issues.
Table of contents
Safety Comes First
Disclaimer: The information provided in this blog post is for informational purposes only. Climbing onto and working on roofs can be extremely dangerous. Always prioritize safety and, if unsure, seek the expertise of a professional roofer. We are not responsible for any injuries or damage that may occur as a result of following the instructions or tips in this post. Proceed with caution and always use appropriate safety measures.
Best Time to Install Roof Vents
If you live in Arizona working on the roof is always best in the winter when it's cooler. Nothing worse than working on your roof in 110F/43C heat. If you live in Montana winter is probably not the greatest time to work on your roof. Using common sense can save your life and potentially additional damage to your roof.
If you're in a hurry and it's off-season, consider using a professional. Oftentimes they will give you a quote per vent. Having a professional install your vents may save you from costly roof replacements in the future.
Tools and Materials You'll Need
Before you begin setting up your roof vent, it's important to have everything ready. Here's a list of tools and items you'll require:
- Roof Vent
- Ladder
- Marker or Chalk
- Tape Measure
- Utility Knife or Saw
- Screwdriver or Drill
- Roofing Nails or Screws
- Roofing Sealant or Caulk
- Safety Gear
Guide on Roof Vent Installation
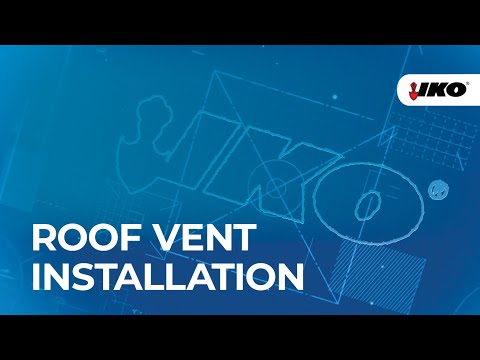
This guide will show you how to put in a roof vent in the right way. Remember, always prioritize safety, and if you're unsure at any point, consult with a roofer. For a visual guide, there's a helpful video available online that you can watch.
Choose the Right Location
Roof vents are most effective when spread out evenly across the roof's surface. Ridge vents, specifically, are designed to be positioned along the roof's highest point, its peak. If you're working with box or static vents, you'll want to place them somewhat close to the roof's ridge, but not directly on the peak. This positioning helps maximize the flow of hot air out of the attic.
Mark the Spot
Before you cut, decide where the vent will go. Use chalk or a marker to draw its shape on the roof. Usually, you'll draw a circle or square a bit smaller than the vent itself.
Cut the Opening
After marking the spot, cut out the shape using a knife or saw. Make sure to cut through the roof's top layer and the board underneath. This makes the hole for your vent. Protip: Use a drill with a speed bore bit to make your initial opening. Then use a jigsaw for your final cut.
Prepare the Vent
Some vents come equipped with flashing or require flashing to be installed underneath. This flashing serves as an added layer of protection against water intrusion. If your vent type requires flashing, attach it now to prepare for installation.
Install the Vent
With your opening cut and flashing in place if required, it's time to install the vent. Position the vent so that it aligns with the cutout area, ensuring it sits snugly and flat against the roof's surface. Roofing nails or screws will hold it in place. For ridge vents, this may involve a continuous installation along the entirety of the ridge.
Waterproof the Vent
After attaching your vent, make sure to seal its sides. Use roofing glue or caulk around the vent's edges. For extra protection, you can add a strip of roofing paper on top, nail it, and cover it with some roof tiles.
Double-Check Your Work
After installing the vent, take a moment to review your work. Ensure that the vent is securely attached and that there are no visible gaps or spaces where water might find its way in, especially during a heavy rainstorm.
Cleaning Up
Like any project, cleaning up afterward is essential. Gather any debris, leftover materials, and tools from the roof. Also, responsibly dispose of any old roofing material you might have removed during the installation process.
Monitor After Installation
After completing the installation, the job isn't entirely over. In the days or weeks following, check the inside of your attic, especially after rainfalls, to ensure no leaks are present. Furthermore, keep an eye on the attic's temperature and humidity levels to confirm that the vent is helping to maintain an effective ventilation balance.
Types of Roof Vents
When it comes to maintaining a comfortable and energy-efficient home, roof vents play an essential role. These vents ensure proper airflow, preventing heat buildup in the summer and reducing moisture during colder months.
Not all roof vents are created equal. From those that are strategically placed along the roof's peak, to vents powered by solar energy, there's a variety designed to cater to various needs. Let's dive into the different types of roof vents and understand their unique benefits.
Ridge Vents
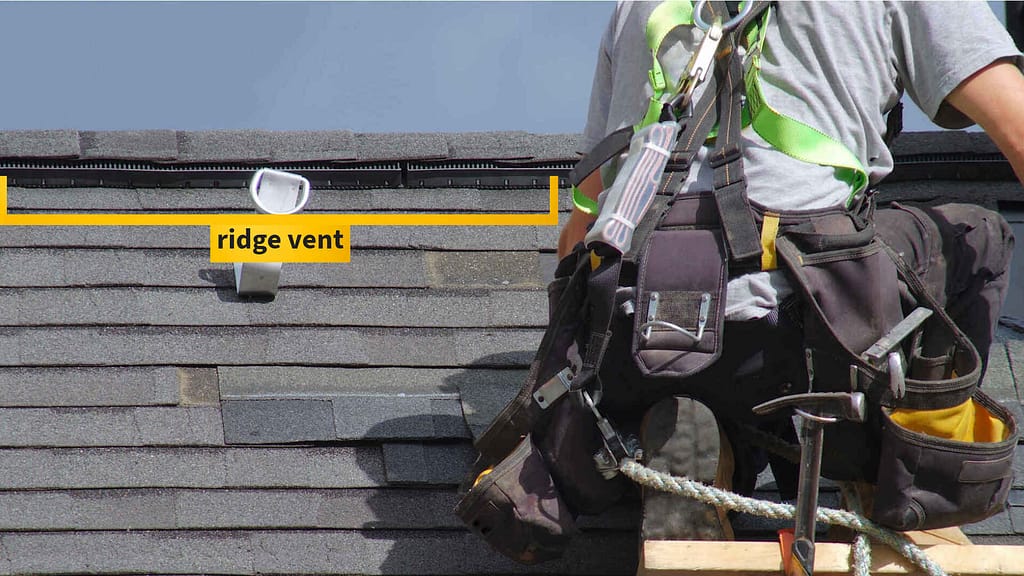
Ridge vents run along the top or peak of the roof, providing an escape route for warm and moist air trapped in the attic. By allowing this air to escape, they help maintain a balanced temperature inside the attic, reducing potential damage to the roof materials from excessive heat or moisture.
Soffit Vents
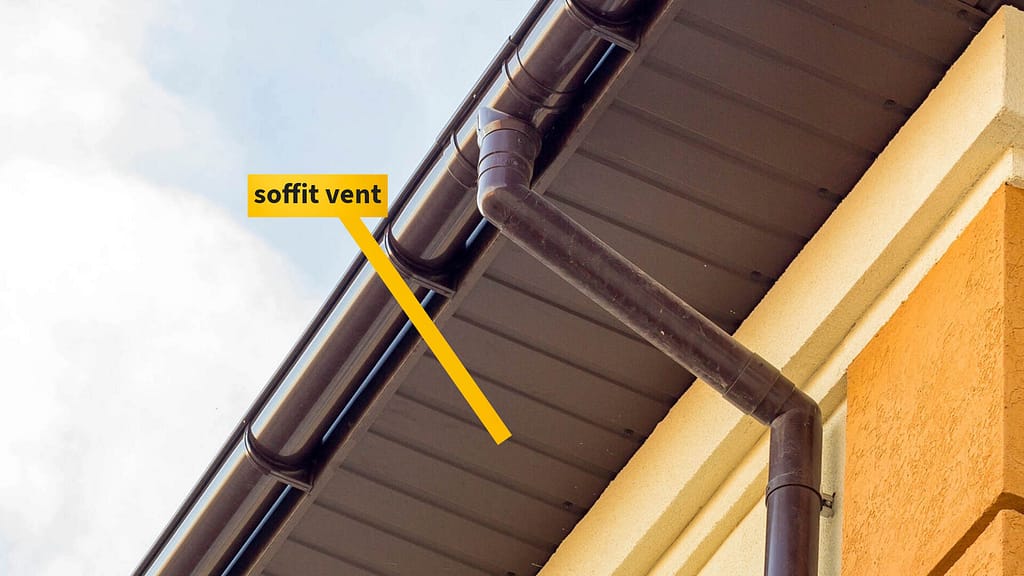
Soffit vents are located under the roof edges. They allow cool air into the attic. This cool air pushes the warm air out, helping to keep the attic dry and well-ventilated.
Turbine Vents
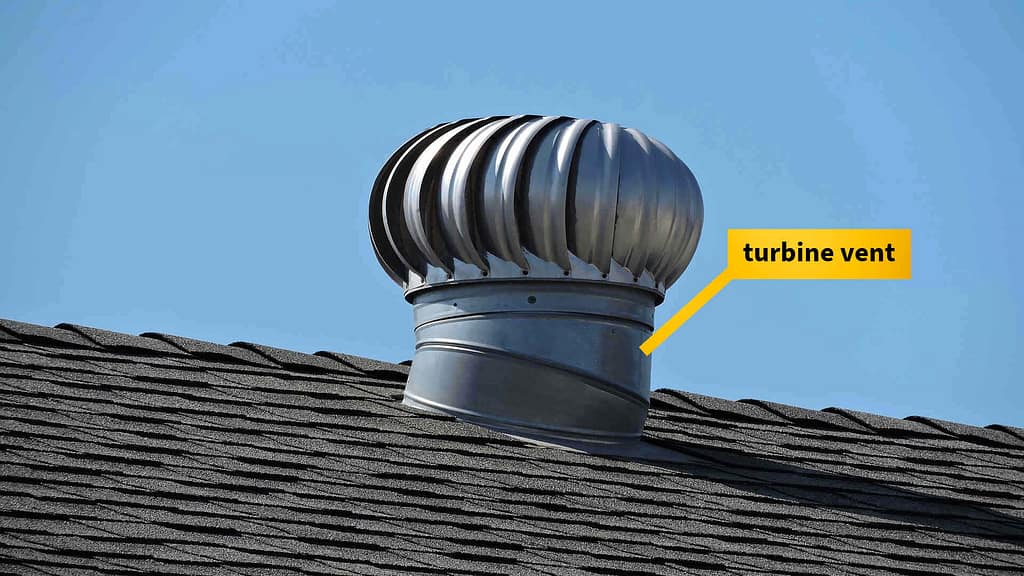
These are circular vents equipped with spinning blades. As the wind blows, it rotates the blades, which in turn, pulls out the hot air from the attic. They're especially effective in regions where winds are a regular occurrence.
Box Vents
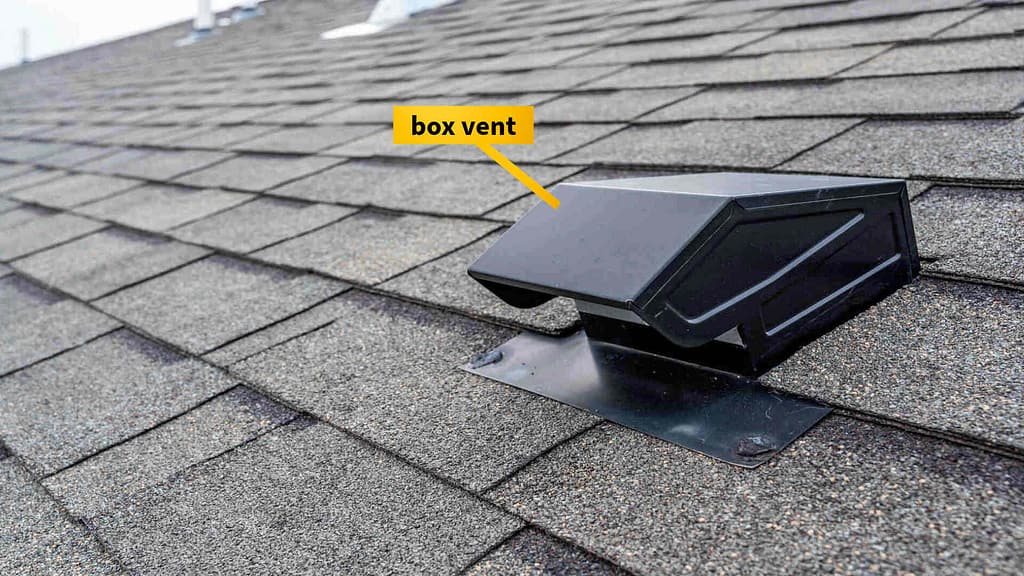
Also known as static vents, box vents don't have any moving parts. They rely on the principle of natural convection. As warm air rises, it exits through these vents, promoting circulation in the attic and helping to reduce excessive warmth.
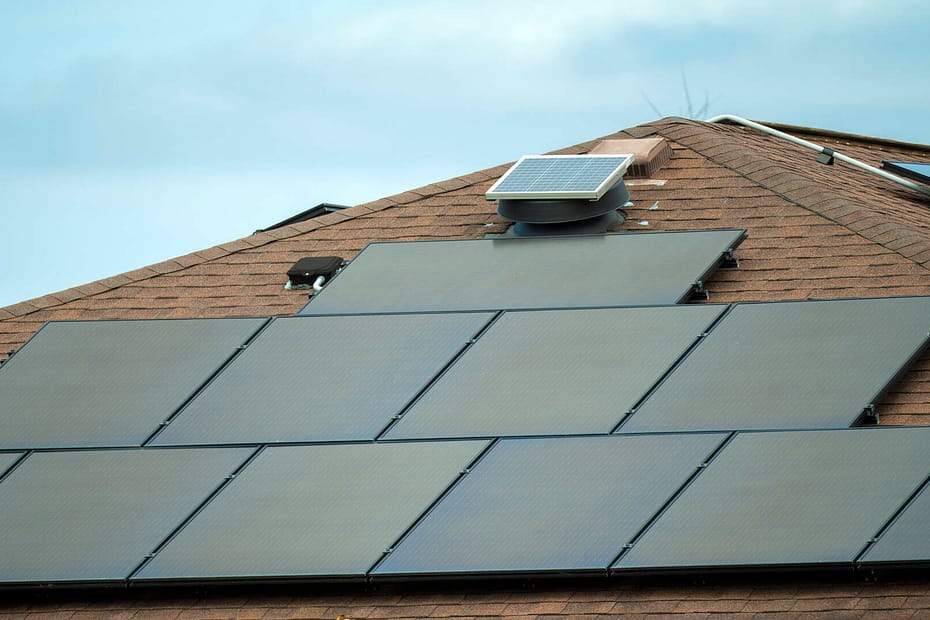
Solar Vents
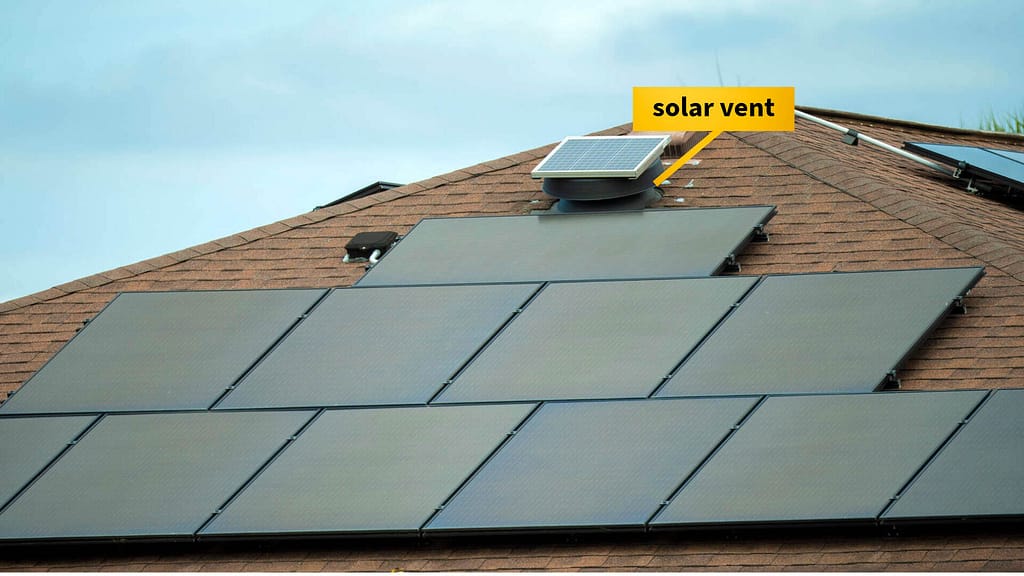
Embracing the power of renewable energy, solar vents use solar panels to power a fan. This fan actively expels hot air from the attic. Not only do they provide efficient ventilation, but they also harness solar energy, making them an eco-friendly choice for homeowners.
Common Mistakes to Avoid
Putting in roof vents can be tricky. Knowing the common mistakes can help you do it right. Let's look at what to avoid.
- Wrong Placement: Vents shouldn't be too close to the roof's peak or too low.
- Using Few or Many Vents: Balance is the key. Too few or too many can disrupt airflow.
- Mixing Vent Types: Different vents, like ridge and gable vents, might not work well together.
- Forgetting Intake Vents: Both exhaust and intake are necessary for good ventilation.
- Bad Sealing: Make sure the vent is sealed well to stop leaks. If you see water coming in, you might want to learn how to fix a leaking roof.
- Not Checking Local Building Codes: Some areas have specific regulations about roof vent installations.
- DIY Without Proper Knowledge: If you put in vents without knowing how to do it right, you might make mistakes. If you're not sure, ask an expert or get someone skilled to do it.
- Not Blocking Animals: Put up guards so birds and animals can't get in.
How do I Know if I Need a Roof Vent?
- Attic's Climate: If the attic feels very hot in the summer or extremely cold in winter, it's a sign of insufficient ventilation. Signs of moisture or visible condensation further indicate the issue.
- Rising Energy Costs: An unexpected increase in your heating or cooling bills can indicate that your attic lacks proper ventilation, making your home harder to keep at a comfortable temperature.
- Roof Health: Early aging or changes in roof shingles, like warping, curling, or buckling, could be due to an overly hot attic from inadequate ventilation.
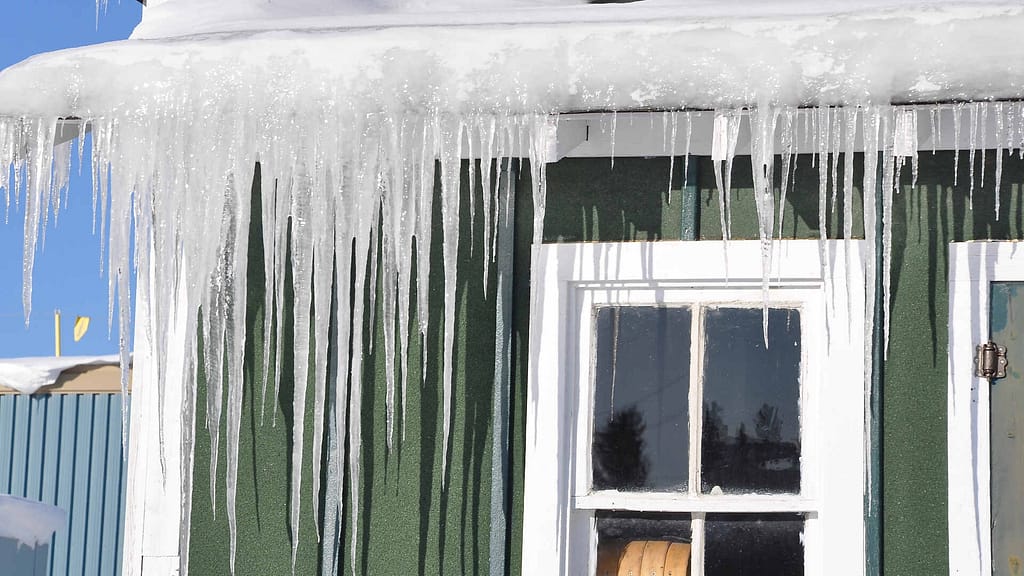
- Ice Dams: In colder climates, if ice dams form at the edge of your roof in the winter, it's a sign of poor attic ventilation. If you don't have good vents, ice can build up and damage your roof. In the worst cases, these issues can lead to the need for a roof replacement in Alaska. So, if you're in a place with cold or very humid weather, having a roof vent is a smart choice.
- Mold and Mildew: The presence of mold or mildew in the attic strongly indicates moisture buildup. This suggests that you might need better ventilation.
- Existing Vents: Just having vents doesn't mean they're effective. They might be blocked, too small, or not adequately distributed for proper airflow.
Conclusion
Putting in roof vents helps your roof and home. We explained briefly how to add a roof vent and the tools you need. Among the various vent types available, it's very important to select the one best suited for your house. Additionally, it's important to realize that just because you have vents, it doesn't guarantee their effective operation.
If your attic feels warm or has mold, you might need better vents. In cold places like Alaska, good vents are very important. Furthermore, when vents function properly, not only can you save money, but your home also becomes safer.
Fact checked by Christinne Somo - 10/16/23